This post has been along time coming but I knew it would take me a while to put together so I've been dragging my feet. That seems to be the theme of all of my posts lately, doesn't it? Oh well, that's just the season of life I'm in right now. Anyway, I am excited to finally share our finished deck with you! I was putting this post off because I wanted to take DSLR photos but my camera hasn't been working so these iPhone pics are just going to have to do. I realize it's mid-August and you're probably not looking for deck inspiration but better late than never! 

The first step was to build a faux boxwood wall. Our deck is a really nice size and I wanted to make sure we took advantage of Minnesota summer but knew that since our neighbor's house was so close we would feel uncomfortable being out there without any sort of privacy. We looked into buying a retractable option like this or planting some tall, thick plants but neither option was quite right. I then remembered that Hitha (a favorite follow!) had shared Meg's post about how to build a boxwood wall and that idea stuck. I loved the idea of something that provided privacy and would also look nice. Right around the time I was deciding to build my privacy wall Hitha had one put in in her backyard and it looks so so good! I tackled mine a little bit differently than Meg suggested because I didn't want anything permanent but her post is a great one to reference if you're planning to do something similar.
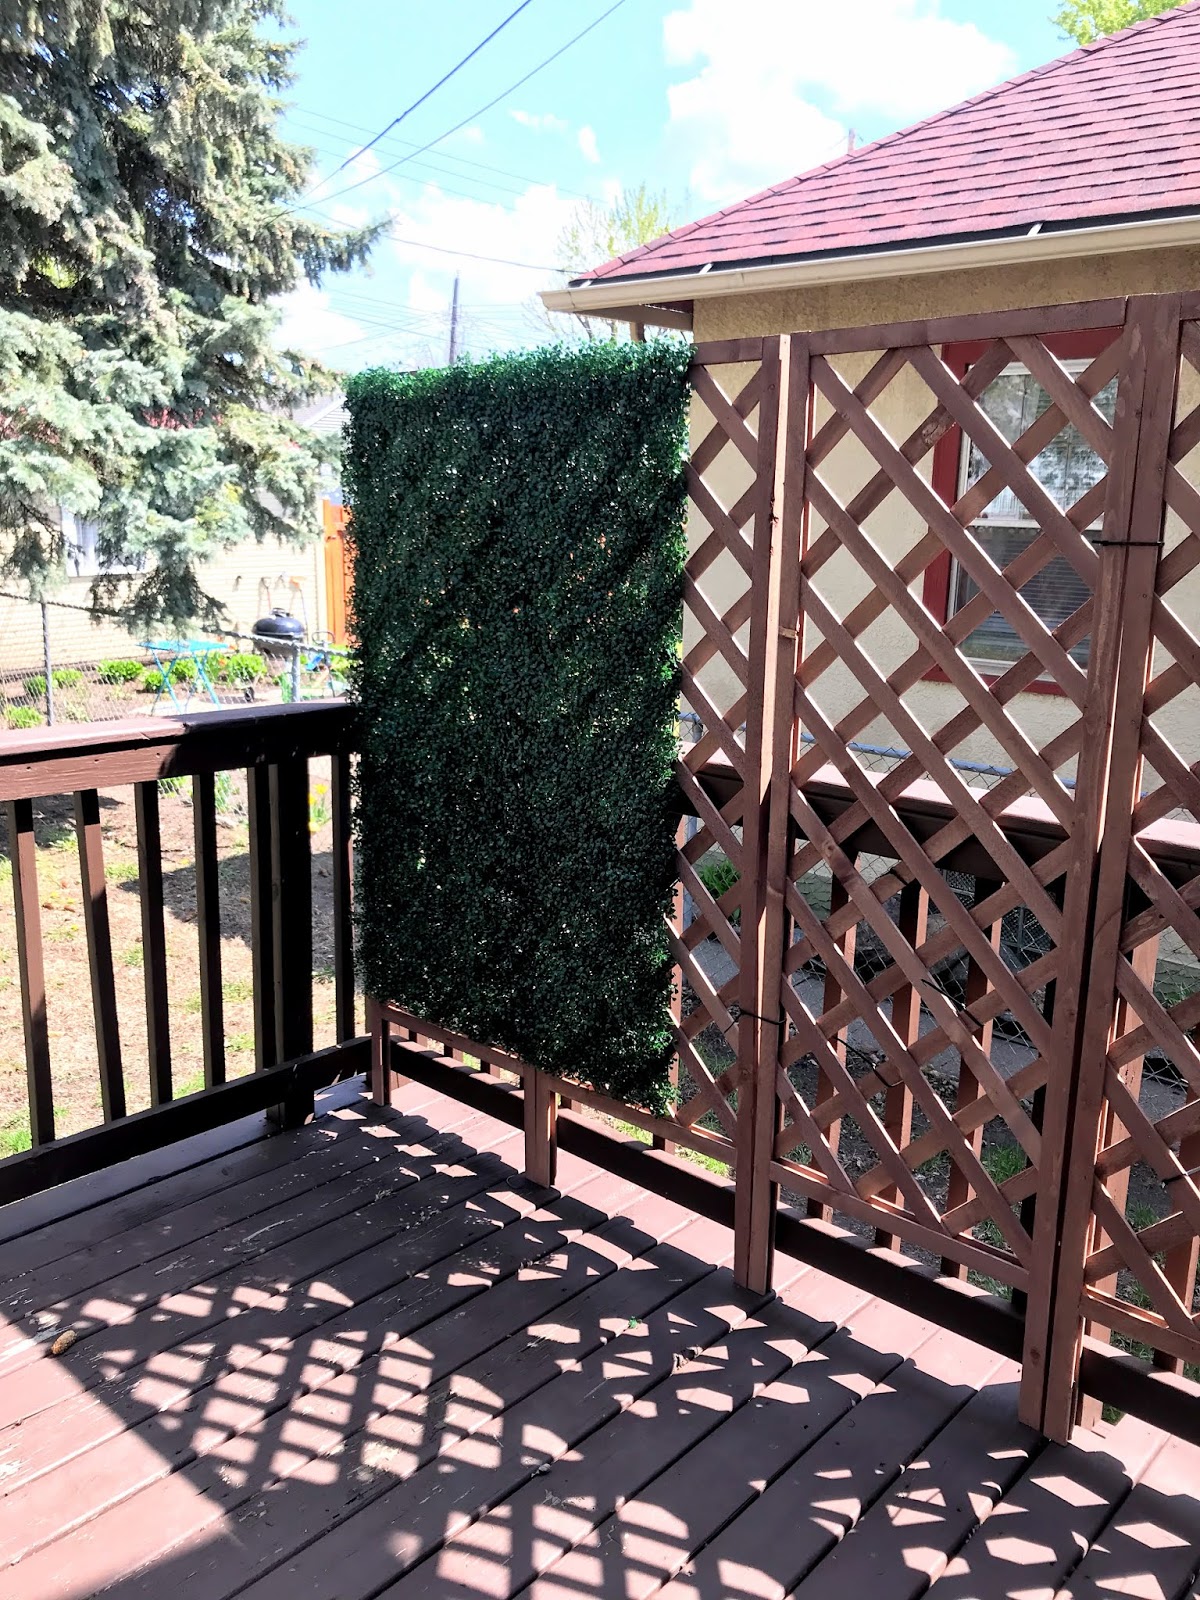
I decided to use these trellises as the base. We rent our house so I didn't want to be drilling anything into the deck so I just used a ton of zip ties. I ended up with five trellises and zip tied them together and to the deck railing. The fifth trellis went over the edge of the opening for one of the sets of stairs but I don't really care and think it looks better than having it end before the railing ends.

I did some searching on Amazon and these faux boxwood panels had good reviews so I bought two boxes and ended up with some left over. The worst part of the whole project was fastening the panels together and zip tying them to the trellis. They're pretty scratchy and you have to really get in there so my hands got a little scratched up. It only took a couple of hours and then voilà it was finished!
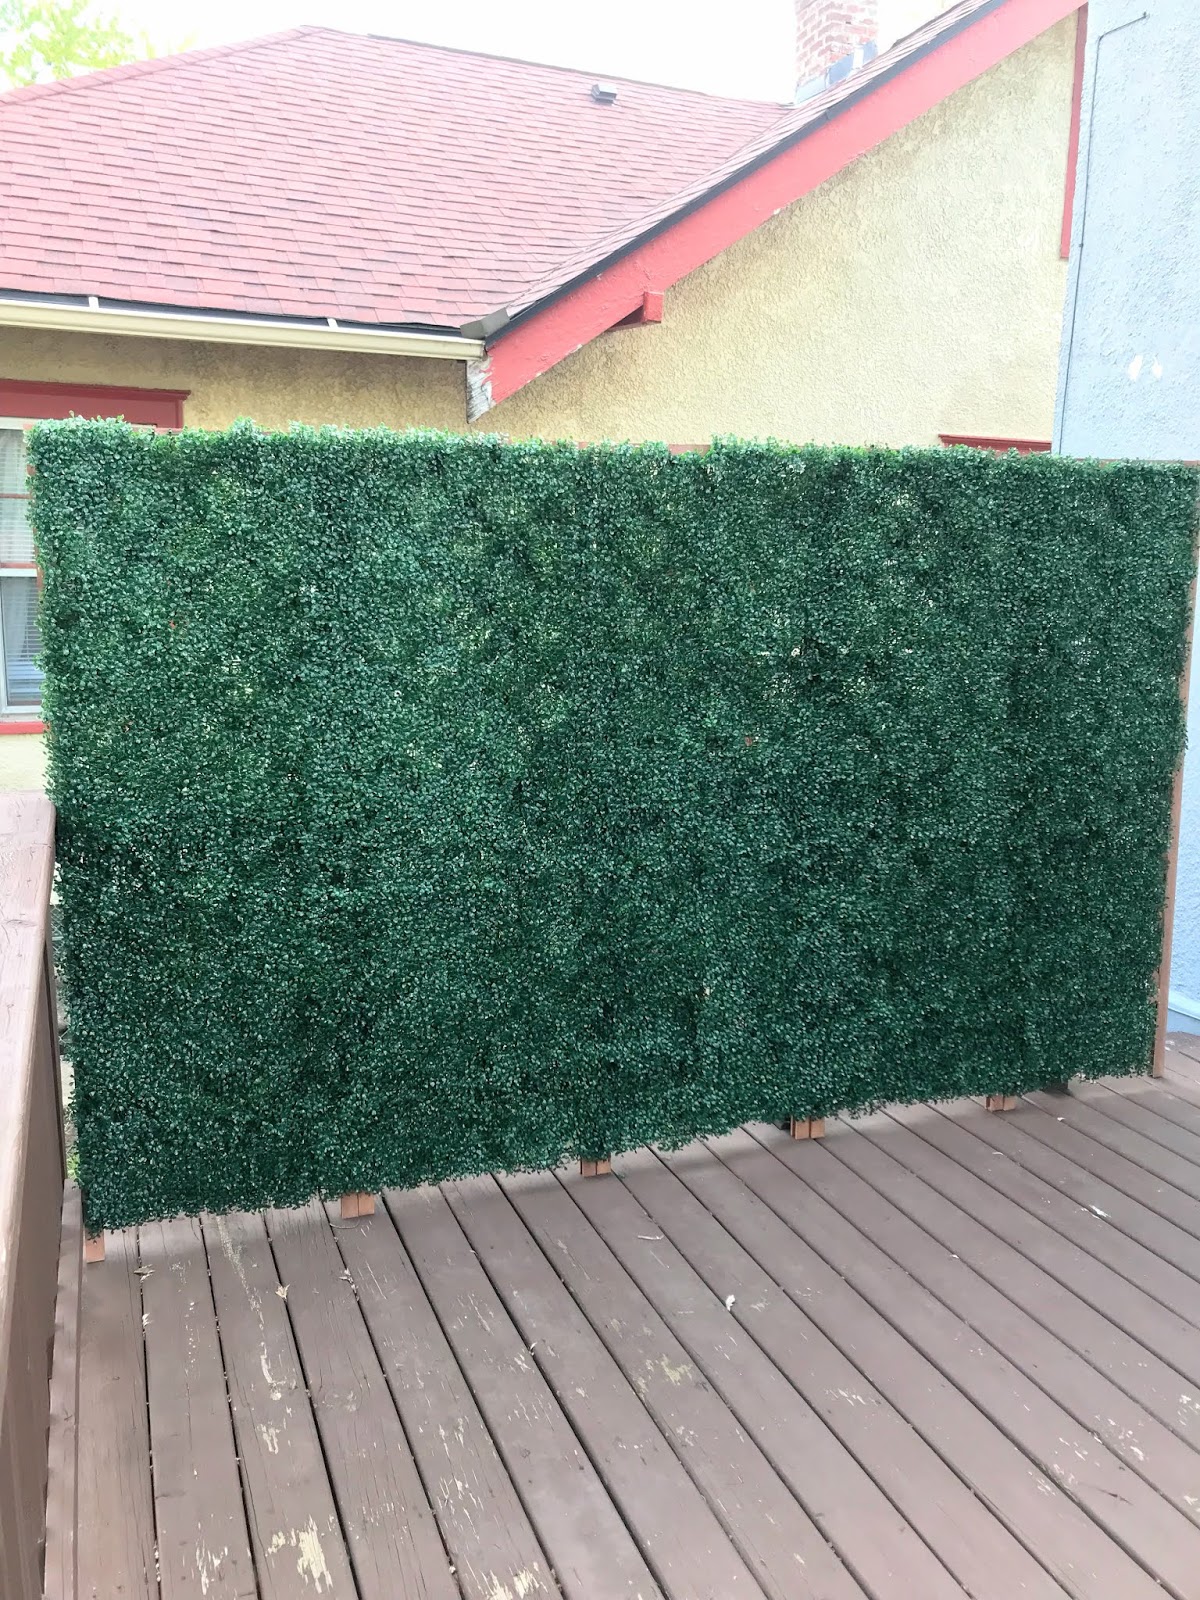
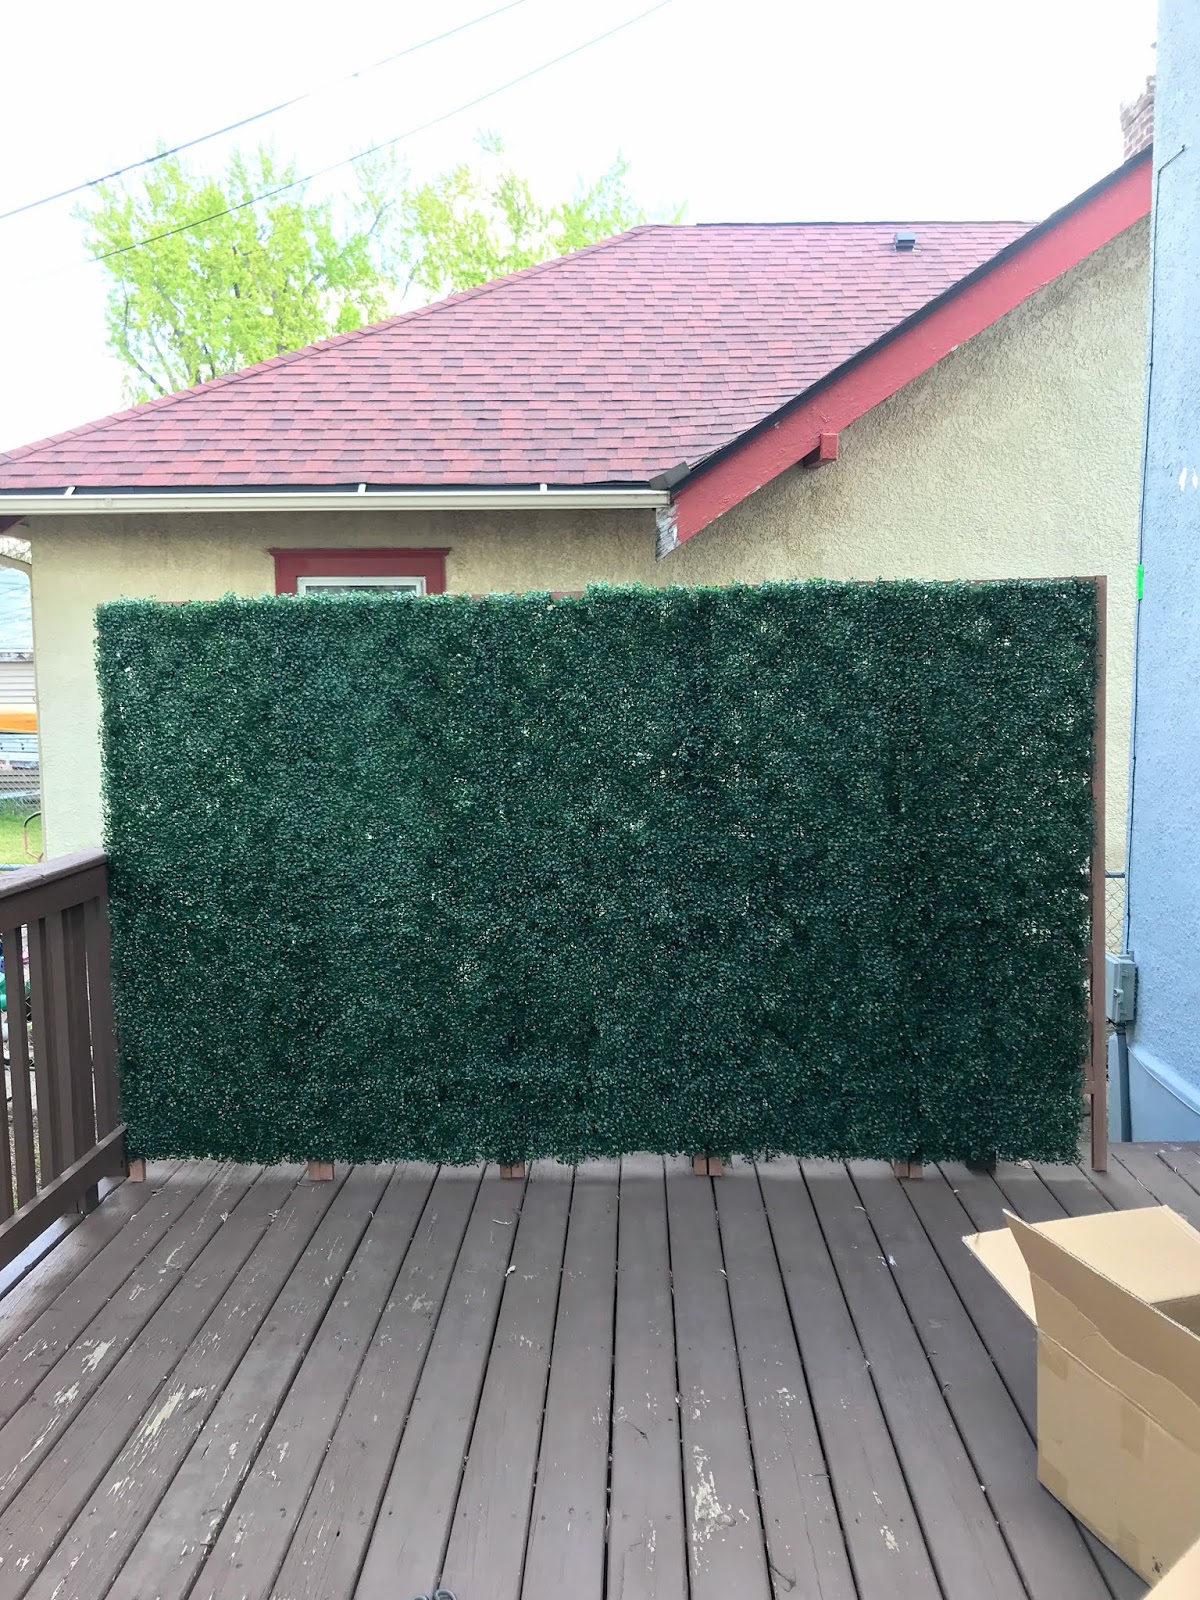
It didn't end up totally straight and so you can see it doesn't line up on the right side but I wasn't going to redo it so it's good enough!

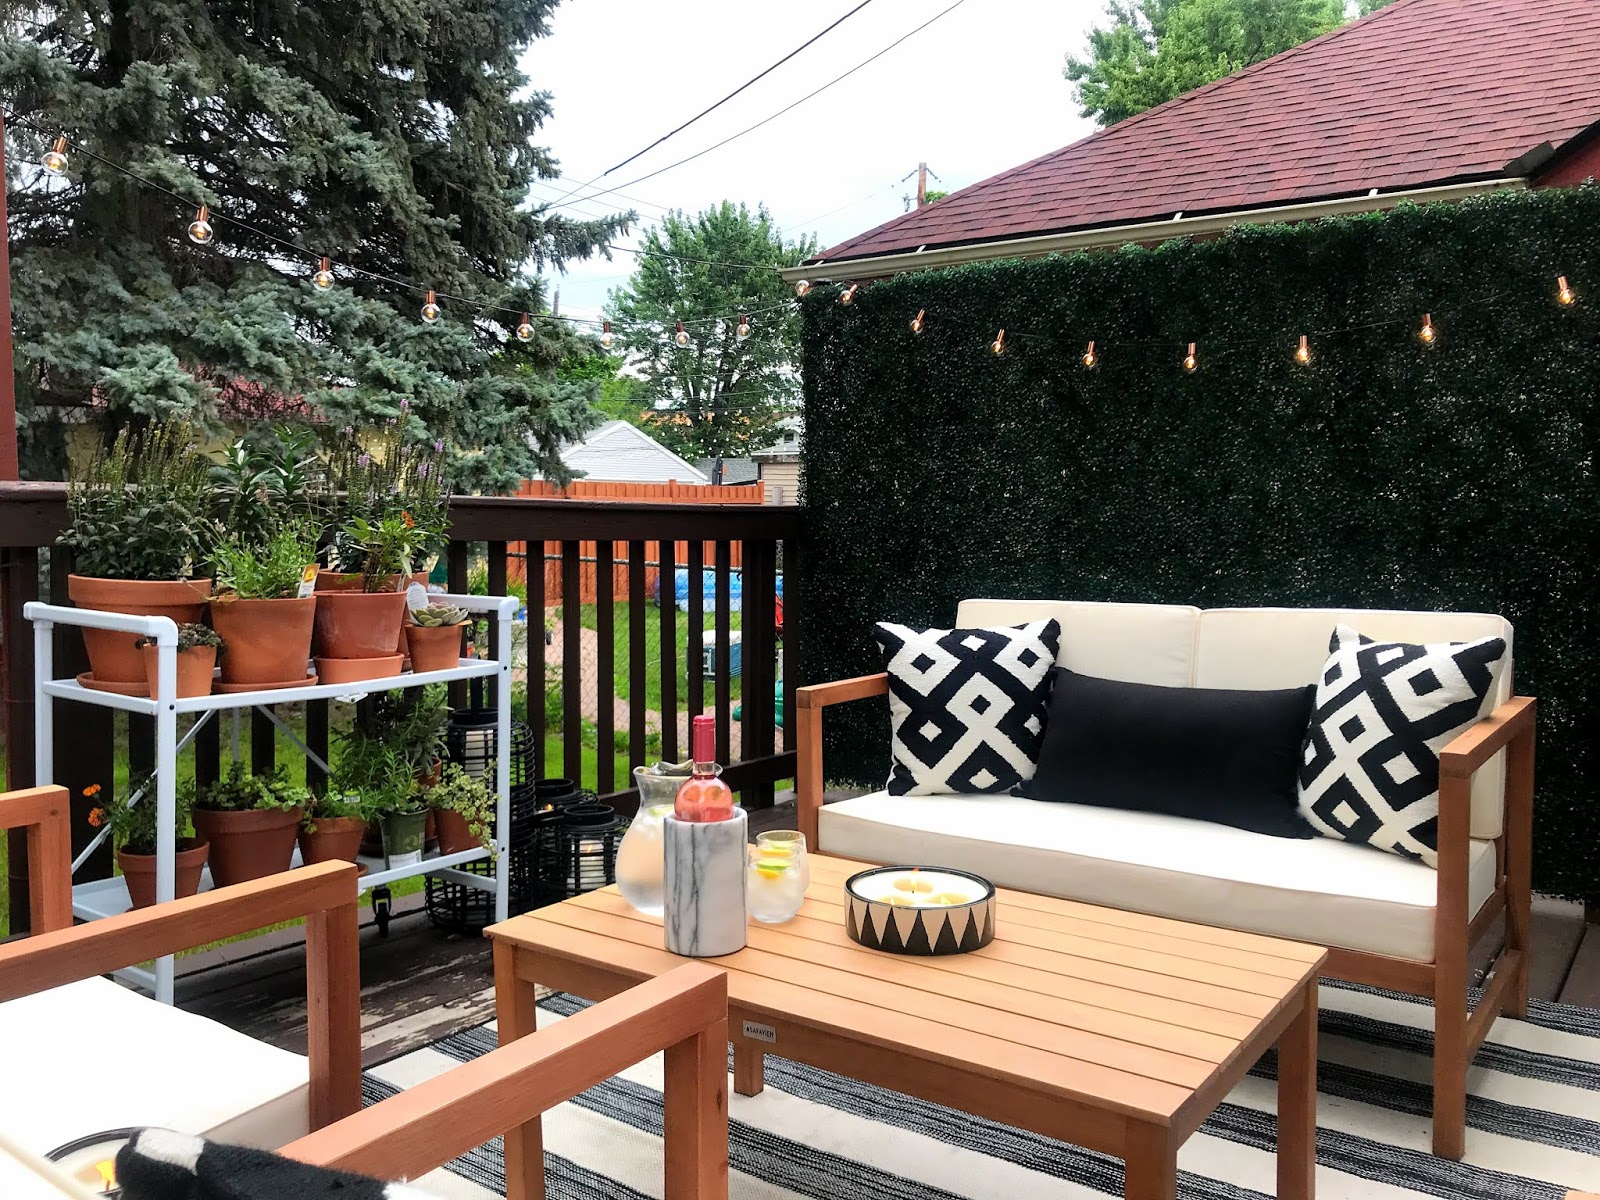
The wall made the biggest difference and has definitely served its purpose! I'm also happy to say it's stayed standing and still seem very sturdy even after several windy storms. Still trying to decide if we should just leave it up through the winter or not.
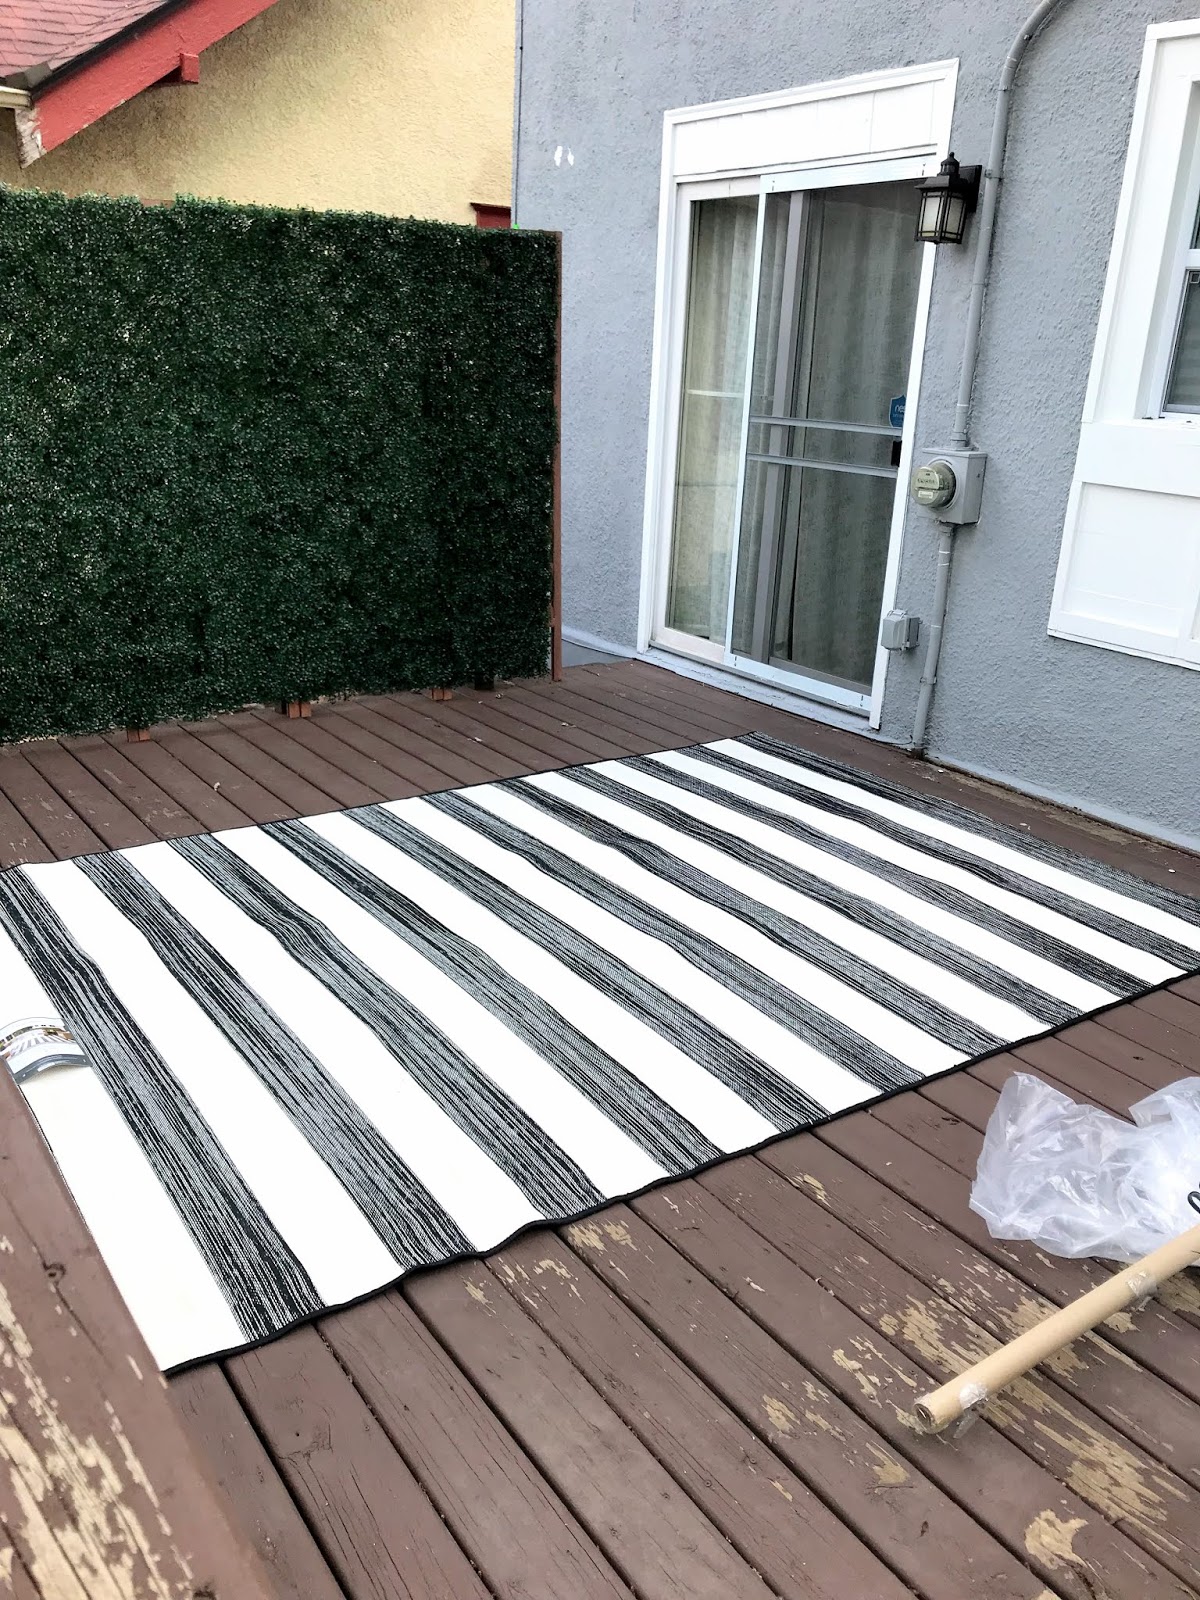
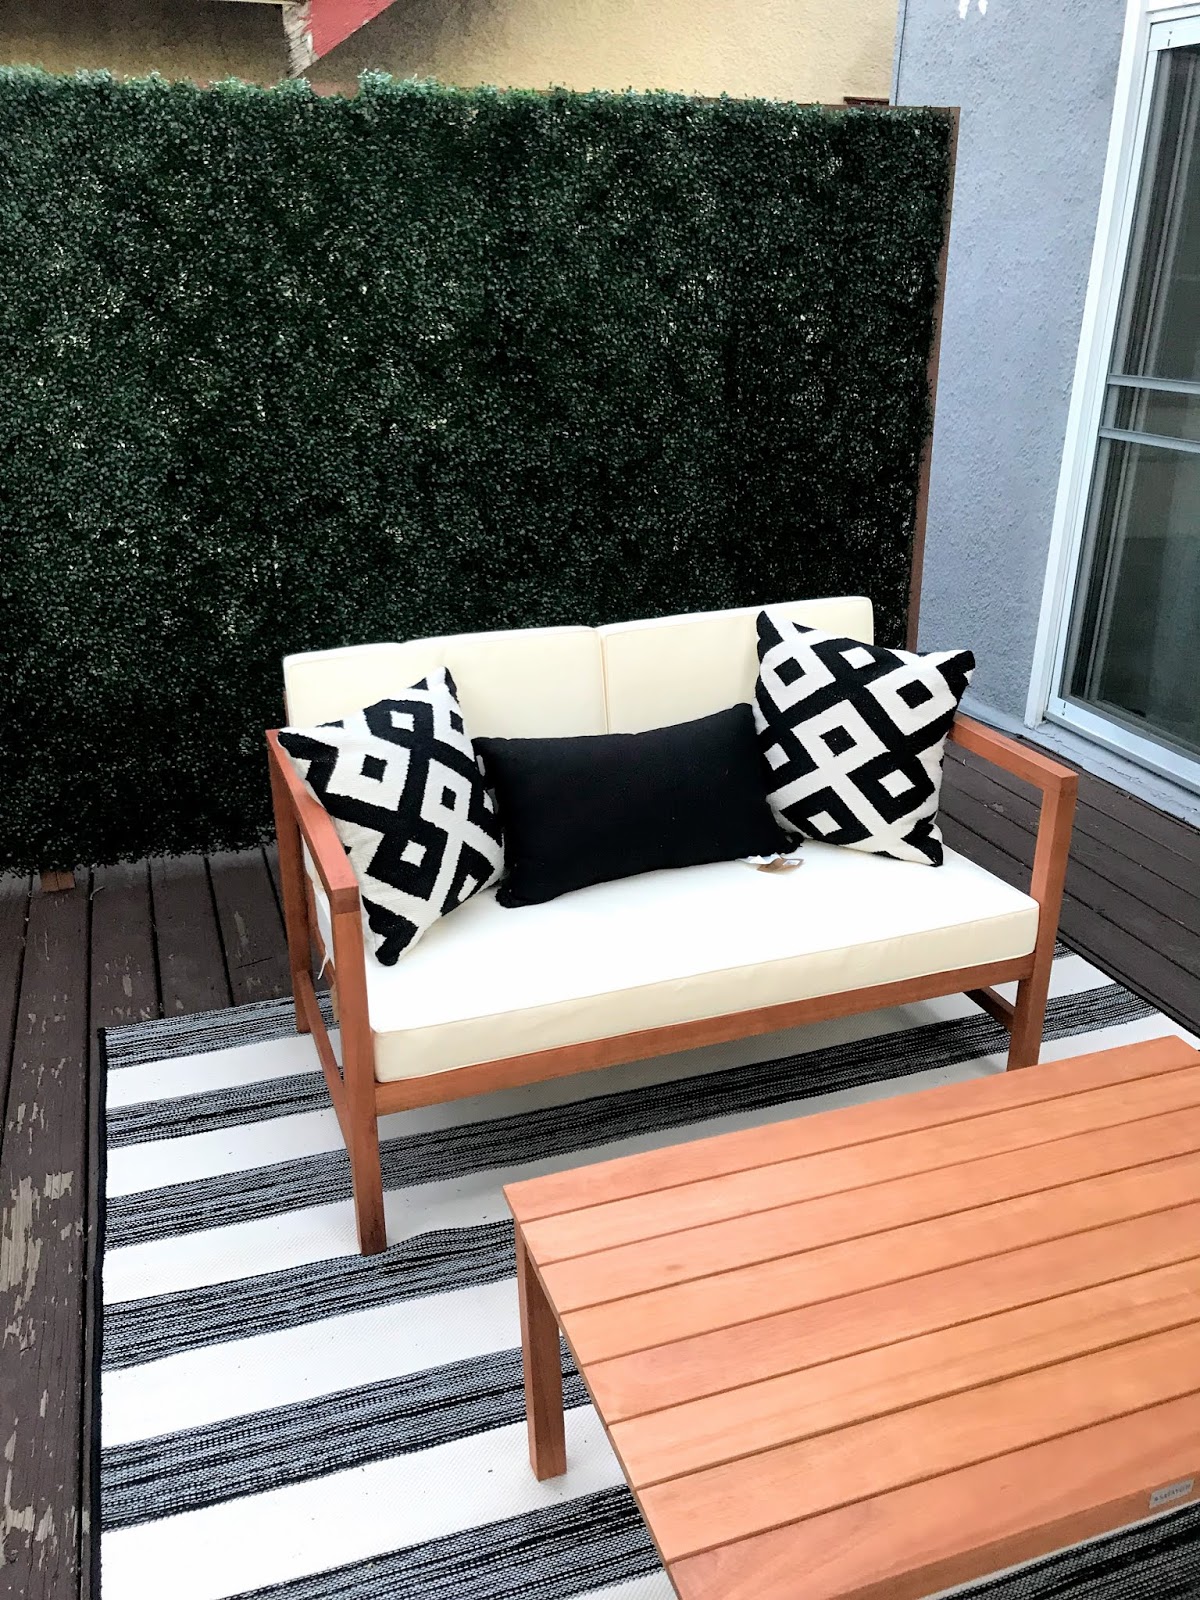
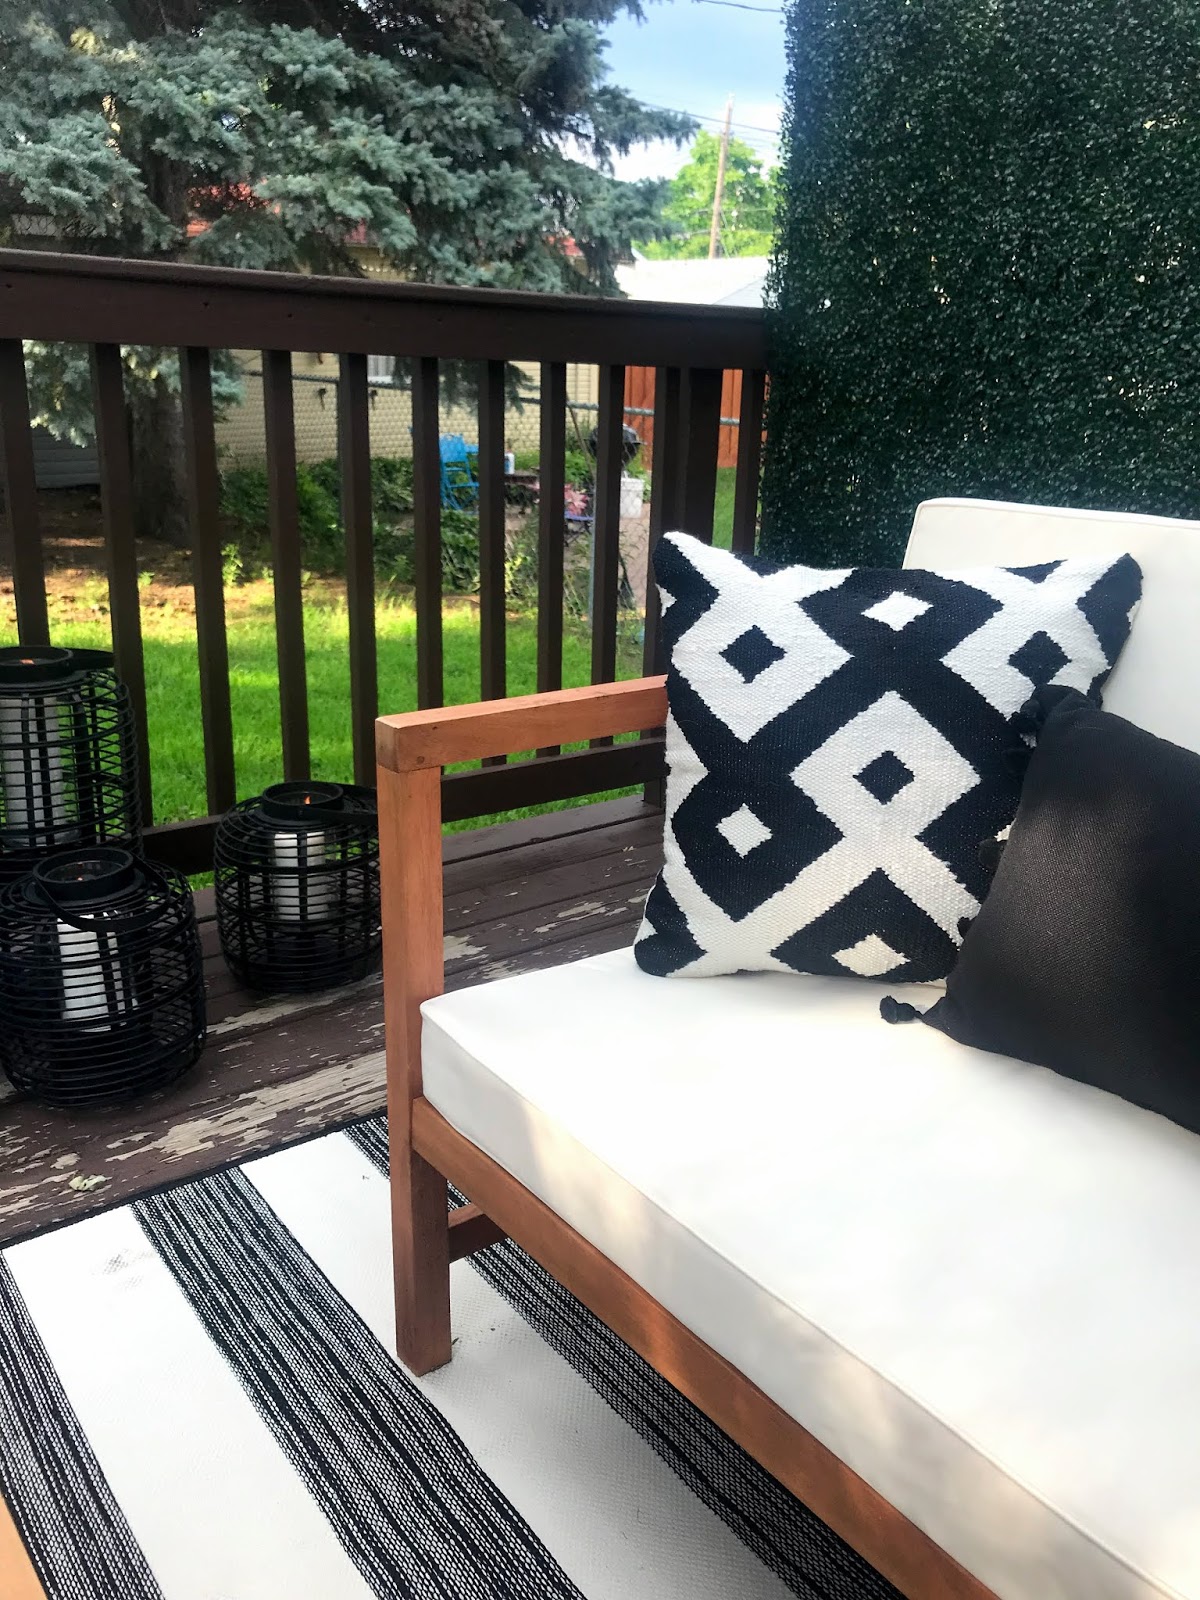
The next step was to get a rug. I was between doing a blue and white or black and white color scheme and ultimately decided to do black and white since I'm definitely feeling the neutrals right now. I used pins like this, this, this and this as my inspiration. I realize that getting a partially white outdoor rug isn't the smartest move but it was relatively inexpensive so if we only get 1 or two years out of it I won't be devastated. This is the rug we got and it's currently out of stock but this one is very similar.

Next up was picking out a furniture set. We were able to snag this one when it was on sale and have been very happy with it so far.


Next was the lights! I went with these ones. I stole the idea from my friends to get some pieces of wood, spray paint them and zip tie them to the deck to hang the lights from. I tried hanging them with command strips and found out the hard way that that wouldn't work so then we stapled them and they've stayed put. I don't have a great picture but you can see the posts in the one below.


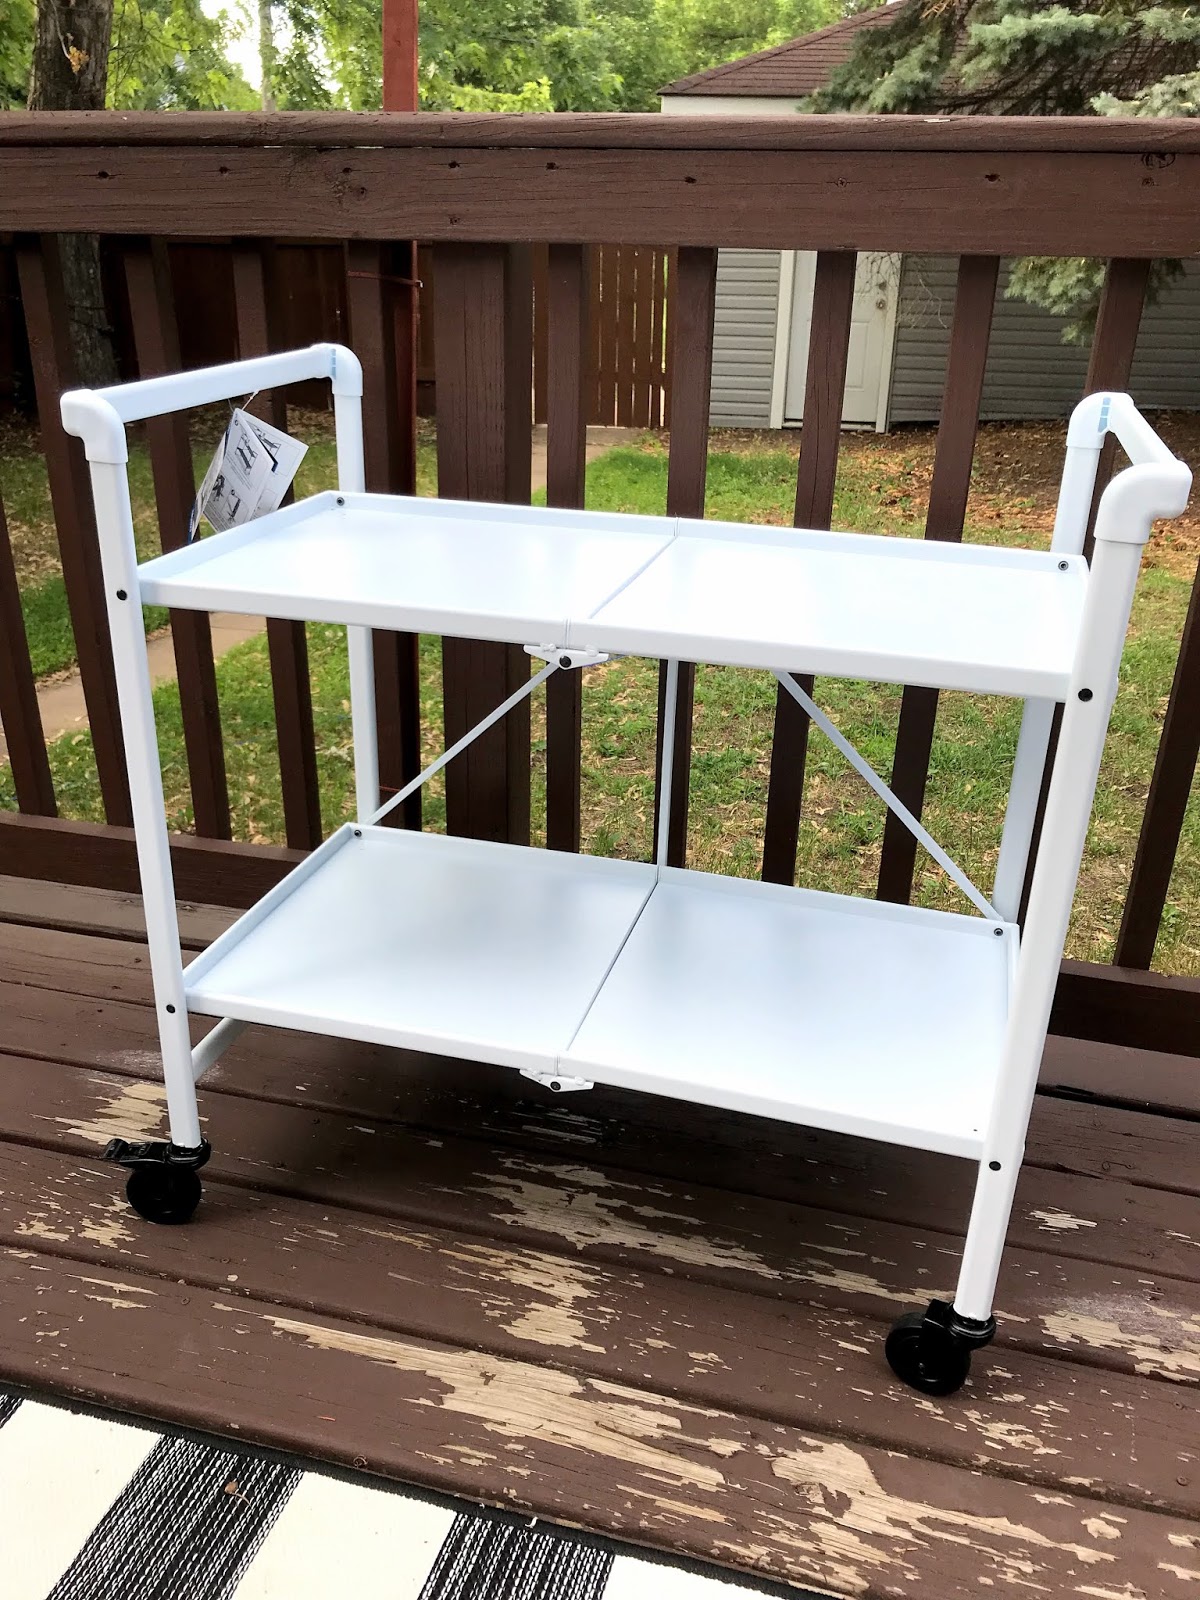
My sister-in-law got me this fun outdoor cart and I decided to turn it into a plant stand. Unfortunately half the plants are already looking pretty sad but I wanted to add some greenery and color to the space.


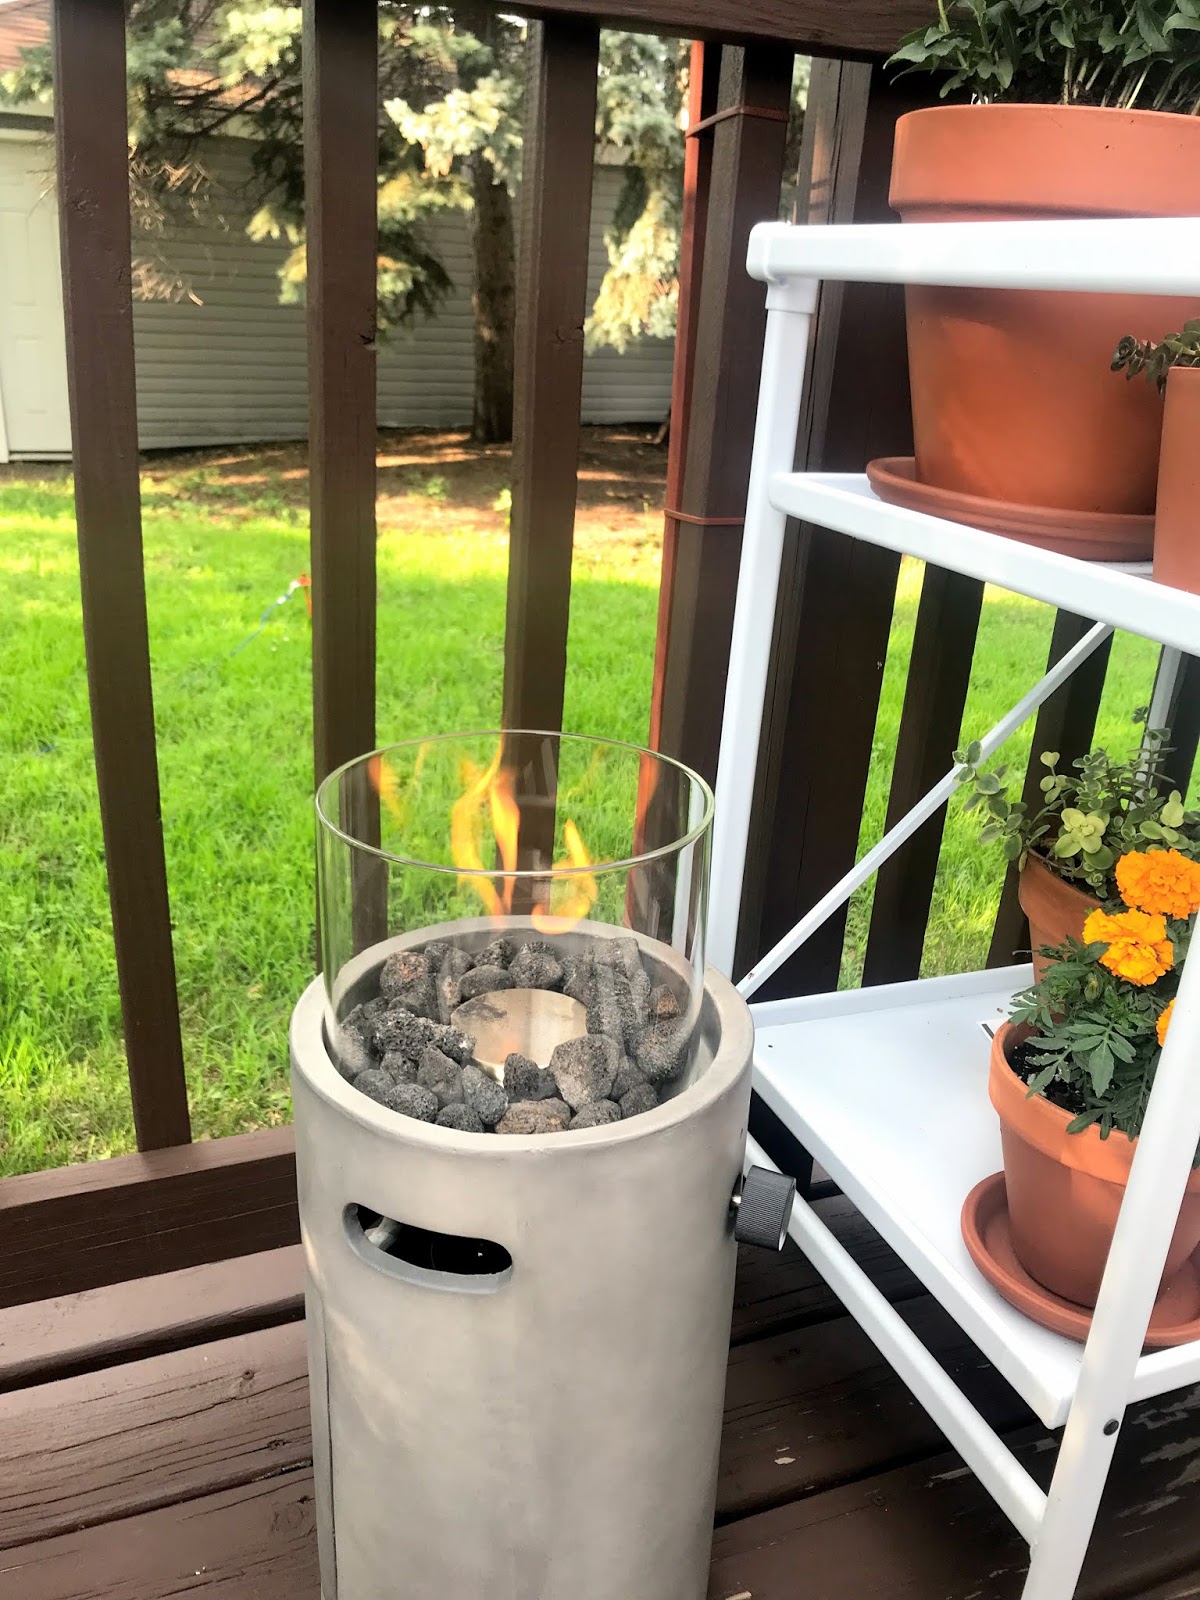
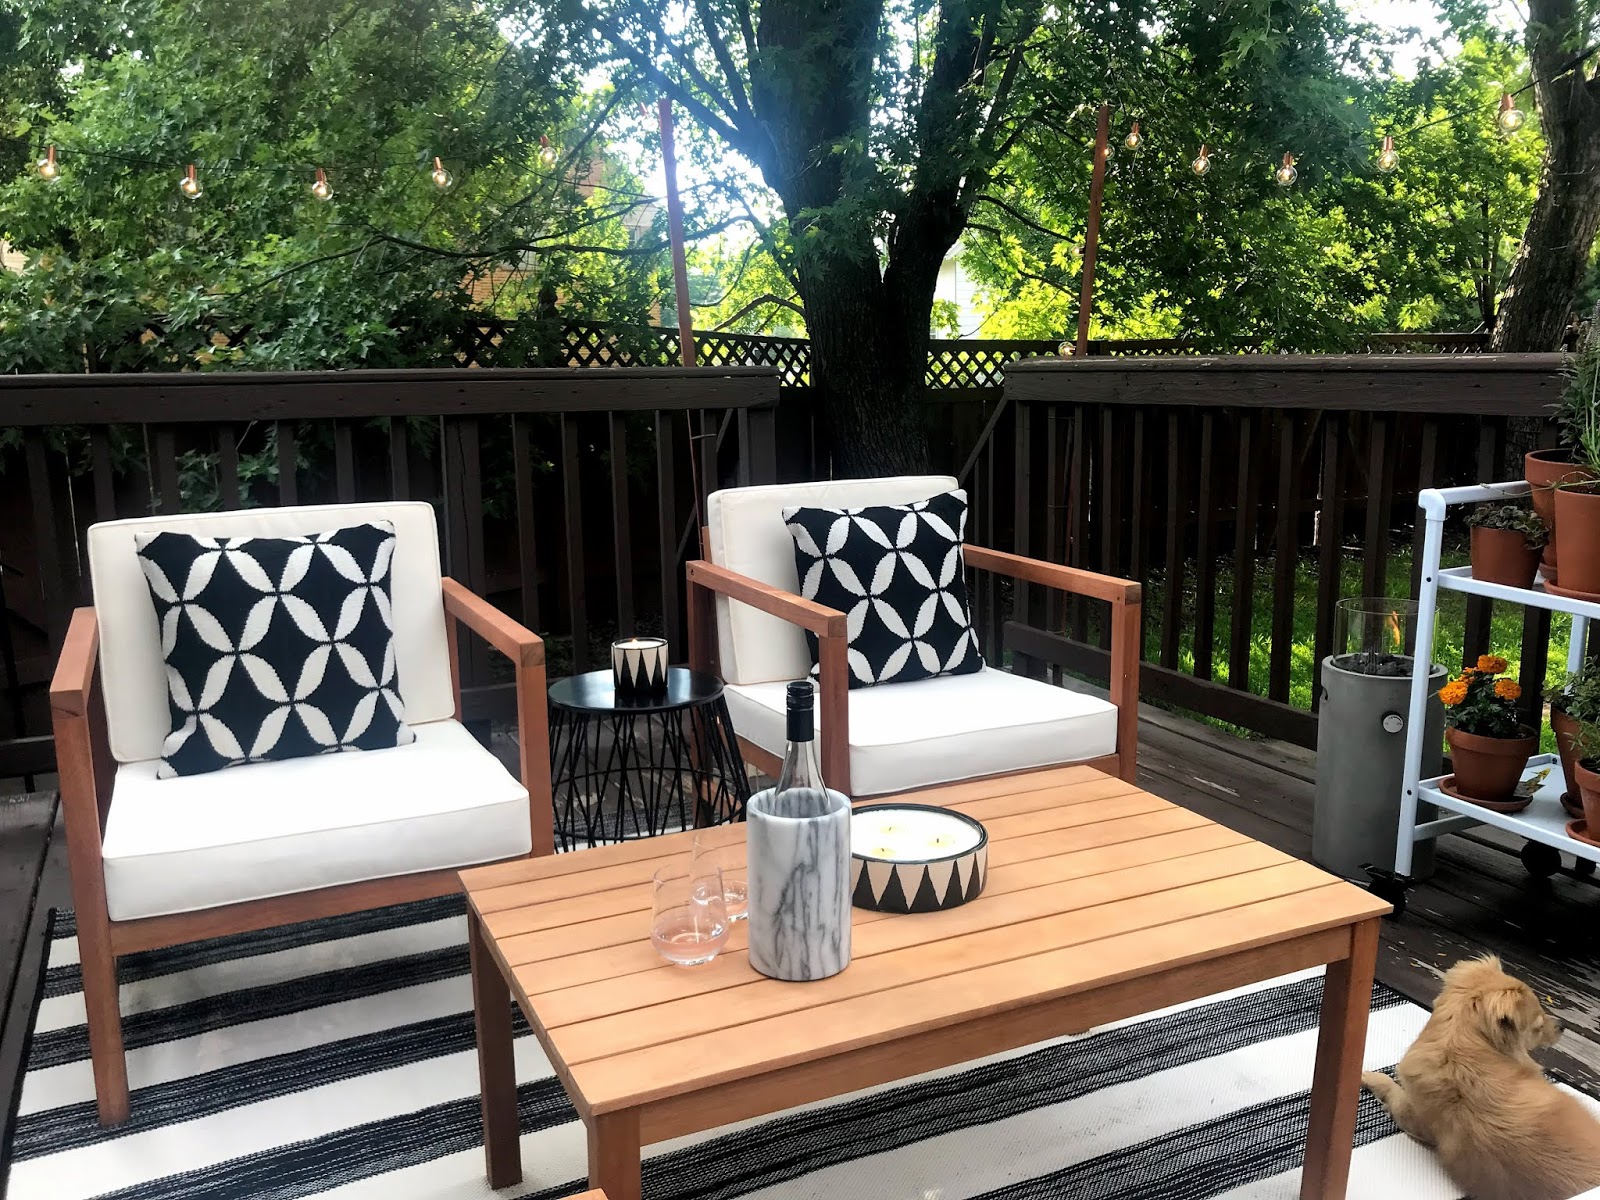

The finishing touches were this geometric table (similar), a portable fire pit, citronella candles and lanterns.


Well there you have it! I'm so happy with how it turned out and we've already gotten a ton of use out of the space having friends over and even watching Twins games out on the deck. You can find me here until the first snowfall!
xo Catherine


Post a Comment